
Working with large paper surfaces is quite common in several projects. However, gluing this large paper surface seems like a simple task at first. But in reality, there arises a big problem of wrinkles and bubbles. That’s what ruins your entire paper project. So the question is: How to Glue Large Paper Surfaces Without Bubbles or Wrinkles?
When bubbles and wrinkles appear on the paper’s surface while gluing, they make it look messy. In many cases, you may even have to start over, which wastes both time and effort. But the good news is that avoiding these bubbles and wrinkles is possible. Don’t know how? Don’t worry! To help you, I will explain the step-by-step process for applying glue to a large paper surface without bubbles or wrinkles. So let’s get started.
Why Do Bubbles and Wrinkles Happen?

Before you resolve the problem, you must first know its cause. Once you know the cause, it’s much easier to tackle the issue. So, the first reason for bubbles on a large sheet of paper is air trapped beneath it. Actually, when you place the paper too quickly on the surface, there’s no way for the air to escape. It gets locked inside and forms small raised pockets, which we see as bubbles. However, wrinkles usually happen when the paper does not stick evenly at the same time.
Some parts of this paper stick out immediately, while others do not. Due to this difference, the paper starts pulling in uneven ways. That uneven pull is what creates the wrinkles. Lastly, the other combined reason for both wrinkles and bubbles is the glue itself. Sometimes you put more than enough glue in one area and less in another. Now the paper will behave differently at each spot. The wet areas will become soft and form bubbles. However, the dry areas will stretch a little and cause wrinkles.
How to Glue Large Paper Surfaces Without Bubbles or Wrinkles: Stepwise Guide
Now you understand what actually causes wrinkles and bubbles on large paper surfaces. If yes, it’s now much easier to get started. But if you still feel confused, it’s normal! Here, I will discuss steps to help you glue large paper surfaces without bubbles or wrinkles.
Step 1: Clean the Surface & Plan the Placement
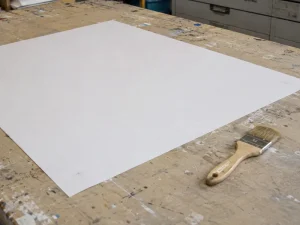
The very first thing to do is clean the surface where the large paper will be glued. Remember, if that surface is dirty or oily, the glue will not even stick. Even a small particle on that surface will help the air get in and create bubbles. So, first, thoroughly clean the surface with a wet cloth and make sure there is no dust left.
Once done, let that surface dry; if there is moisture, it will prevent the glue from sticking. After drying, next you have to plan where the paper will go. For this placement, check alignment, measure the space, and place the paper lightly, without applying glue, for testing. This planning at this stage will help prevent adjustments and rework later.
Step 2: Choose the Right Glue Type & Apply an Even Glue Layer
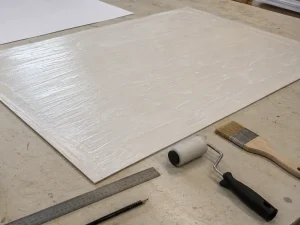
Now you have a clean surface and have decided on the paper placement. Right? The next part is to choose the right glue type. Remember, not every type of glue is suitable for paper. Some are even so harsh that they can burn the paper. Also, some glues dry quickly and don’t give you time to make adjustments, while others remain wet for a long time. So it’s more crucial that you make the right choice according to your needs.
Generally, for paper sticking, the best glue options are PVA glue, wallpaper spray adhesive, and glue sticks. So choose the one that is easily available to you. Now, it’s time to apply the glue evenly as a thin layer on the surface where the paper will go. If the glue is uneven, the paper will not stick as well everywhere.
So start by applying a small amount of glue. Here, many of you make the mistake of using too much at once. Know that too much glue will create wet patches and uneven sticking. Apply a small amount, then use a brush, roller, or sponge to spread the glue evenly. But move the roller only in one direction, not randomly. If you accidentally apply glue to the wrong spot, you can remove it using a glue remover at this stage.
Step 3: Start Positioning Paper from One Edge & Place it Slowly
Now that you have applied the glue evenly across the surface, it’s time to position the paper. At this point, don’t make the mistake of sticking the large paper at once. If you place the full paper in one go, air will also be trapped with it. That is the main reason that bubbles appear. That’s why, first, choose a starting point on the surface; it can be its edge or corner.
Now, align the corner of the paper with this starting point and fix it here. Then lower the rest of the paper portion very slowly, but not suddenly. This slow movement will help you guide the paper properly and avoid sudden mistakes. If you still notice anything not going right here, like the paper is not going in the right direction, quickly fix it at this point.
Step 4: Smooth from Center Outward & Work in Sections
After you have successfully placed the paper, the next step is to smooth it. This is where you ensure that there are no air bubbles or wrinkles. So take a suitable roller or squeegee and place it in the center of the paper surface. You might make the mistake of placing the roller at the edge. Don’t do that. Why? Because the center is where air usually gets stuck; it must be handled first. Now press the roller from the center and move outward in all directions, left to right and top to bottom.
This movement will push the trapped air toward the edges. From the edges, it can escape more easily. Moreover, when you are dealing with a large paper surface, it’s not a good idea to try to smooth everything at once; instead, work in small sections. So divide the paper’s large surface into sections and smooth one area at a time. This might take time, but the results will be satisfying.
Step 5: Remove Air Bubbles & Let It Dry Completely
Once you smooth the paper surface, the final step is to check for bubbles. Keep in mind that even if you smooth from the edges outwards, sometimes bubbles remain that you might not feel at first. So look closely at those bubbles under good light. If you see something like a bubble, do not ignore it. You can remove it as the glue is still wet. The longer you waste time thinking, the harder it becomes to fix the bubble later.
If you find bubbles, remove them gently by pushing them toward the nearest edge using your fingers or a soft cloth. After you are sure the surface is smooth, leave the paper untouched so that it can dry completely. Also, do not press or lift the wet paper during drying time, as the air can still be trapped inside, causing the bubbles to form again. Once you are sure that the paper surface is fully dry, you can pick it up and use it without wrinkles or bubbles.
Tips to Avoid Bubbles and Wrinkles On Large Paper Surfaces
Working with a large sheet of paper, especially when gluing, is not easy. You often face wrinkles and bubbles. But if you adopt some habits, there will be no such issues. To make gluing on a large paper surface easier, here are some tips that you can follow.
- Use Less Glue, Not More: As I said above, the main reason for bubbles and wrinkles is too much glue. When there is extra glue, the paper becomes too wet and soft. This wet surface is more prone to catching air bubbles. So always start by applying a low amount of glue, especially on a large paper surface.
- Always Start from One Side: Secondly, never place the entire paper on the surface at once. If you place the whole paper at once, air gets trapped, and you cannot remove it. So you should always begin from one edge or one corner first.
- Work Slowly: While gluing a large paper surface, do not rush the process. When you work too fast, small mistakes are more likely, and the chance of bubble formation increases. So go slowly and double-check every step as you go.
- Use a Roller, Not Hands: When you press the paper with your hands, the pressure is not equal everywhere. Right? This uneven pressure can trap air, creating small wrinkles. So, while gluing the large paper surface, always use a roller.
- Practice on Small Paper First: If you are a beginner, I don’t recommend starting with a large paper surface right away. This will increase the risk of mistakes and material waste. So it is better to start with a small piece of paper. When you practice on small pieces, you learn each step more deeply.
Conclusion
Gluing the large paper surface might seem very difficult, especially if you are new to it. The main problem is the formation of bubbles and wrinkles. Remember, once these bubbles come, it’s much more difficult to fix them later on a large surface. It’s best to avoid them from the start.
That’s why, to help you out, I have discussed the step-by-step process for gluing large paper surfaces in this guide. When you follow each step carefully, there will be no risk of bubbles and wrinkles, and the surface will be very smooth. But as it has a large surface, always work in sections and don’t rush. A slight mistake in any step can ruin your entire project.