
Pricing your embroidery work may not always be a straightforward process. In fact, it can feel like walking a tightrope. If the price is too low or too high, you may end up losing money or losing your clients.
But pricing embroidery work is not rocket science either. In essence, it is all about balancing cost and value.
If you are wondering how to price embroidery work, keep reading. We will shed light on everything from stitch counts to profit margins. Hopefully, this post will help you figure out how much to charge for embroidery.

Why Most Embroiders Get Pricing Wrong
When hobbyists start embroidery as a business, they tend to treat it like a side gig. When putting a price tag, they rely solely on their intuitions. And soon they notice that the price tag does not even cover the basic costs.
Embroidery pricing should not be like that. Before you pick a price, consider your time, materials, and skills. If you do not do so, you are just donating your skills. You are doing it for free. Do not take that route if you want to take embroidery seriously.
Look at the Reddit thread r/Machine_Embroidery, and you will soon notice one thing: Charging less than usual is a bad idea. One professional wrote, “Don’t operate your machine for less than $20. Embroidery is a luxury, not a necessity.”
That is spot on. Custom touch can offer a wow factor that mass-produced prints cannot match. And customers pay for that wow factor.
Therefore, move away from “cost-plus” thinking and embrace value-based pricing. When charging for your work, consider the transformation you deliver, not just the work you do. If you manage to do it correctly, it can help boost your embroidery rates by up to 50%. And you do not have to worry about losing your clients.
Bottom line: Proper “how to price your embroidery work” starts with knowing your numbers. Crunch them.
Step 1: Break Down the True Costs
To price something, you must understand it first. Figure out exactly what expenses go into every single embroidered item. The sum of these expenses is the amount you must cover.
Materials
- Thread and stabilizer: The price of a spool of quality polyester thread can be anywhere between $2 and $5, and it can handle 5-10 shirts. For stabilizer, add $0.50-1 per piece.
- Blanks: If you supply shirts and hats, make sure you factor in wholesale embroidery pricing. A basic polo might cost $8-12, and a premium beanie can cost up to $15.
- Other items: On needles, backing, and bobbin thread, expect to spend $0.25-0.75 per job.
Pro tip: You can track them in a simple embroidery pricing spreadsheet. You may find Google Sheets very convenient.
Per shirt, the material cost of embroidery should be $10-15. If you ignore this, your bargain price can soon turn into a loss leader.
Labor
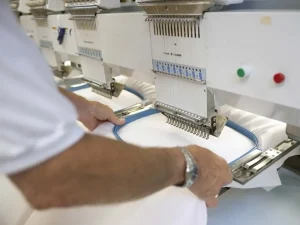
Make sure all your tasks are paid for. Do not forget to bill for hooping, threading, and other things such as quality checks. Setting an hourly rate for your work is a good idea. Starters have an hourly rate of $25-50 while pros charge $50+ per hour.
Typically, you will spend 15-30 minutes embroidering a left-chest logo. Digitizing a custom design can be a bit time-consuming, taking up to a couple of hours. For a project like this, consider charging a flat fee of $20-$30.
One Reddit user wrote that they did a 3.5×3.5-inch logo with 20,000 stitches, and charged $12 as a base price, plus $1 per 1,000 stitches over 10k. So, the total was $20. If we assume that the hourly rate is $26, $20 covers 40 minutes of machine work.
Overhead
Do not forget to consider machine depreciation, internet bill, electricity bill, and your workspace rent. As a rule of thumb, you have to divide monthly overhead by expected output. If your output is 100 per month, you can allocate $5-$10 per item.
Here is a quick formula to find the total cost per piece:
Total cost = Materials + (Labor hours x Hourly rate) + Overhead allocation
For example, for a basic embroidered hat, the math may look like this: $12 for materials + (0.5 hours x $30) + $3 for overhead = $24.75. You can round it up to $25.
Step 2: Pick your Pricing Model
Once you have found the costs, choose a method of structuring your embroidery pricing. Basically, there are two options: stitch-based and flat rate. Both have their pros and cons. Let’s see.
Per-Stitch Pricing
This pricing model is the industry standard because it is an easy way to determine the exact price per stitch for embroidery and ensures precision. In this approach, you charge based on complexity. It is measured per thousand stitches.
The standard charge is $0.80- $1.50 per 1,000 stitches. For beginners, the sweet spot is $1. This is a fair pricing model because the bigger the logo, the more time you have to spend on it.
Here is an example chart that you may find useful:
| Stitch Count Range | Price Per Piece (1-100 Units) | Bulk (100+ Units) |
| Up to 6,000 | $7.75 | $2.50 |
| 6,001-8,000 | $8.75 | $2.75 |
| 8,001-12,000 | $10.25 | $3.25 |
| 12,001+ | $12+ (add $0.35/ 1k extra) | $4+ |
If a logo on a shirt requires 10,000 stitches, you may charge $10 embroidery cost + blank cost. The total price may come to $25-$30.
However, this approach is not all good. It has a downside, too. Some of your clients may not like the idea of estimating stitching costs upfront. In such a case, you will have to find a way to retain that client. But if you do follow this approach, you can use a free tool like Wilcom’s estimator.
Flat Rate
In this method, you charge a fixed rate per item or logo size, regardless of stitch counts. If you are a beginner, you will find it pretty convenient.
Here is an idea for base rates. For a small logo or name (up to 5×5 inches), you can charge $10-$15. For a medium one, the fee can be $20-$25. And $30 for an oversized one.
It works because it is transparent and does not require complicated math. For example, for any left chest monogram, you can charge a flat fee of $15. Hats require trickier hooping, so you can add $5 for them.
Depending on your circumstances, a hybrid approach may work for you. $10 base up to 10k stitches, and then $1 per additional 1k. One Reddit user mentions that they charge at least $25 per order. For 10k stitches, the price starts at $15 and drops for bulk orders.
In general, flat rates work well for large volume orders, and per-stitch pricing is good for custom projects.
Step 3: Create Layers in Your Profit Margins
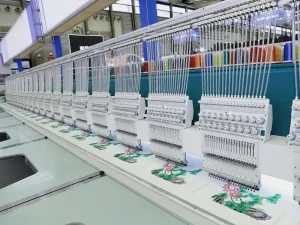
Once your costs are covered, figure out creative ways to generate profits. If the markup on your total cost is 30-50%, that’s a good starting point. That means you make $7-$12 for a $25 piece.
Keep this formula in mind: Selling Price = Total Cost x (1 + Markup %).
Example: $25 cost x 1.40 (40% markup) = $35 final price.
When charging, keep in mind that embroidery is a luxury, and your edge is quality. Do experiments with pricing. You can test with a small batch first.
Many embroiders who use 40% margins report that they get steady clients. Some offer so much quality that they manage to triple their rates without worrying about losing their clients. In that case, quality is the main thing.
Step 4: Factor in Extras
One way to boost your average order value is to upsell the add-ons. Here are some ideas:
- Digitizing fee: Offer to turn artwork into embroidery-ready files for $15-$50.
- Rush jobs: Consider charging an extra 20-50% for same-day turnaround.
- Specialty items: Charge an additional $5-$10 for jackets, hats, or high-pile fabrics.
- Minimums: To weed out tire-kickers, set a minimum threshold for your orders. The amount can be $25-$50.
Examples: For a 5″ baby blanket, charge up to $25. For an oversized plush, charge around $20. Try to find sweet spots and keep things profitable.
Step 5: Use Tools to Streamline
Ditch your conventional calculator and leverage some embroidery pricing calculator magic.
There are free spreadsheets that help you get instant quotes. For example, Crafty Life Mom offers a free downloadable spreadsheet. Just enter the number of stitches, and the spreadsheet will calculate quotes.
Consider using an online calculator, particularly designed for embroidery quotes. EmbroideryNerd.io is one such calculator. It uses factors such as labor, materials, and even location.
Step 6: Price for Your Niche
Your niche can be hats, shirts, or other stuff. How much embroidery costs varies by product. The key is to tailor your rates accordingly.
- Shirts/ Polos: $15-25 for embroidery + $10-15 for blank. The total is $25-40.
- Hats: Charge $10-20 (Curved surface means more complexity) + $8-12 blank. The total is $18-32.
- Blankets/ Sweaters: $5 for names and $20-35 for larger areas.
- Custom Patches: $10-12 for 4×4-inch, when embroidered fully.
Average cost for embroidery? Per industry charts, it’s $10-$30 per piece. For embroidery cost per stitch, a rule of thumb is $1/1k.
Also, consider your location. If you live in an urban area, consider charging about 20% more than an embroiderer in a rural area would charge.
Step 7: Show Your Value
Run a test batch and track your conversion rates. Also, track your feedback and profits. Find pain points and show how you can offer solutions.
Stories are powerful. Find creative ways to use stories to appeal to your potential clients. Communicate your values as professionally as you can.
Avoid These Mistakes
To bulletproof your pricing, here are some common mistakes to avoid:
- Do not undercharge for time: For low-stitch items, always add $10 base.
- Take your competitors seriously: Learn about the embroidery prices in your locality, and avoid matching rock bottom prices. Do not settle for the lowest rate.
- Consider filtering serious buyers by setting a minimum charge: Offer guarantees when applicable. Guarantees help ensure customer satisfaction.
Might you still be mulling over the same old question: Is embroidery expensive? The answer is, yes, to some people, it can feel expensive. In such a case, consider it an investment.
Conclusion
For those wondering how to price machine embroidery work, it is helpful to get started with the $1/1k stitch rule. As a rule of thumb, always attempt to make a 40% profit. Over time, you will find a sweet spot that works well for you and your clients.
The message of this embroidery price guide boils down to this: shift your mindset. Do not just sell thread. Remember that you are crafting memories. Embroidery work is a luxury, so recognize the value of your skills and time.